In post 1 you created an account, a resource group and a budget alert. Now we put something real on the internet: a small Node.js web page running on Azure App Service.
This post also covers something most tutorials skip. On a brand-new account, Azure refused to create the app at all. I’ll show you exactly what that looks like and how I got past it, because you will probably hit it too.
By the end you will have:
- a clear picture of how App Service plans and web apps fit together,
- a running web app at your own
*.azurewebsites.netaddress, - your own code deployed to it from Cloud Shell,
- everything deleted again, for a total cost of a few cents.
1. Two things you create, not one
App Service has two parts, and the portal creates both on one screen:
| Part | What it is | Think of it as |
|---|---|---|
| App Service plan | The server capacity you pay for: size, region, operating system. | Renting a kitchen |
| Web app | Your application, running on that plan. | The restaurant using the kitchen |
You pay for the plan, not the app. Several small apps can share one plan at no extra cost, and deleting the apps does not stop the bill if the plan is still there.
2. Create the web app
In the portal search bar type App Services, then Create → Web App. On the Basics tab:
- Resource group:
rg-learnazure-dev-eus(from post 1) - Name:
app-learnazure-<yourinitials>-dev. It becomes part of a public web address, so it must be unique. - Publish: Code
- Runtime stack: Node 24 LTS
- Operating system: Linux
- Region: East US (match your resource group)
Watch the pricing plan
Further down is Pricing plan, and this is where beginners lose money. Open the list:
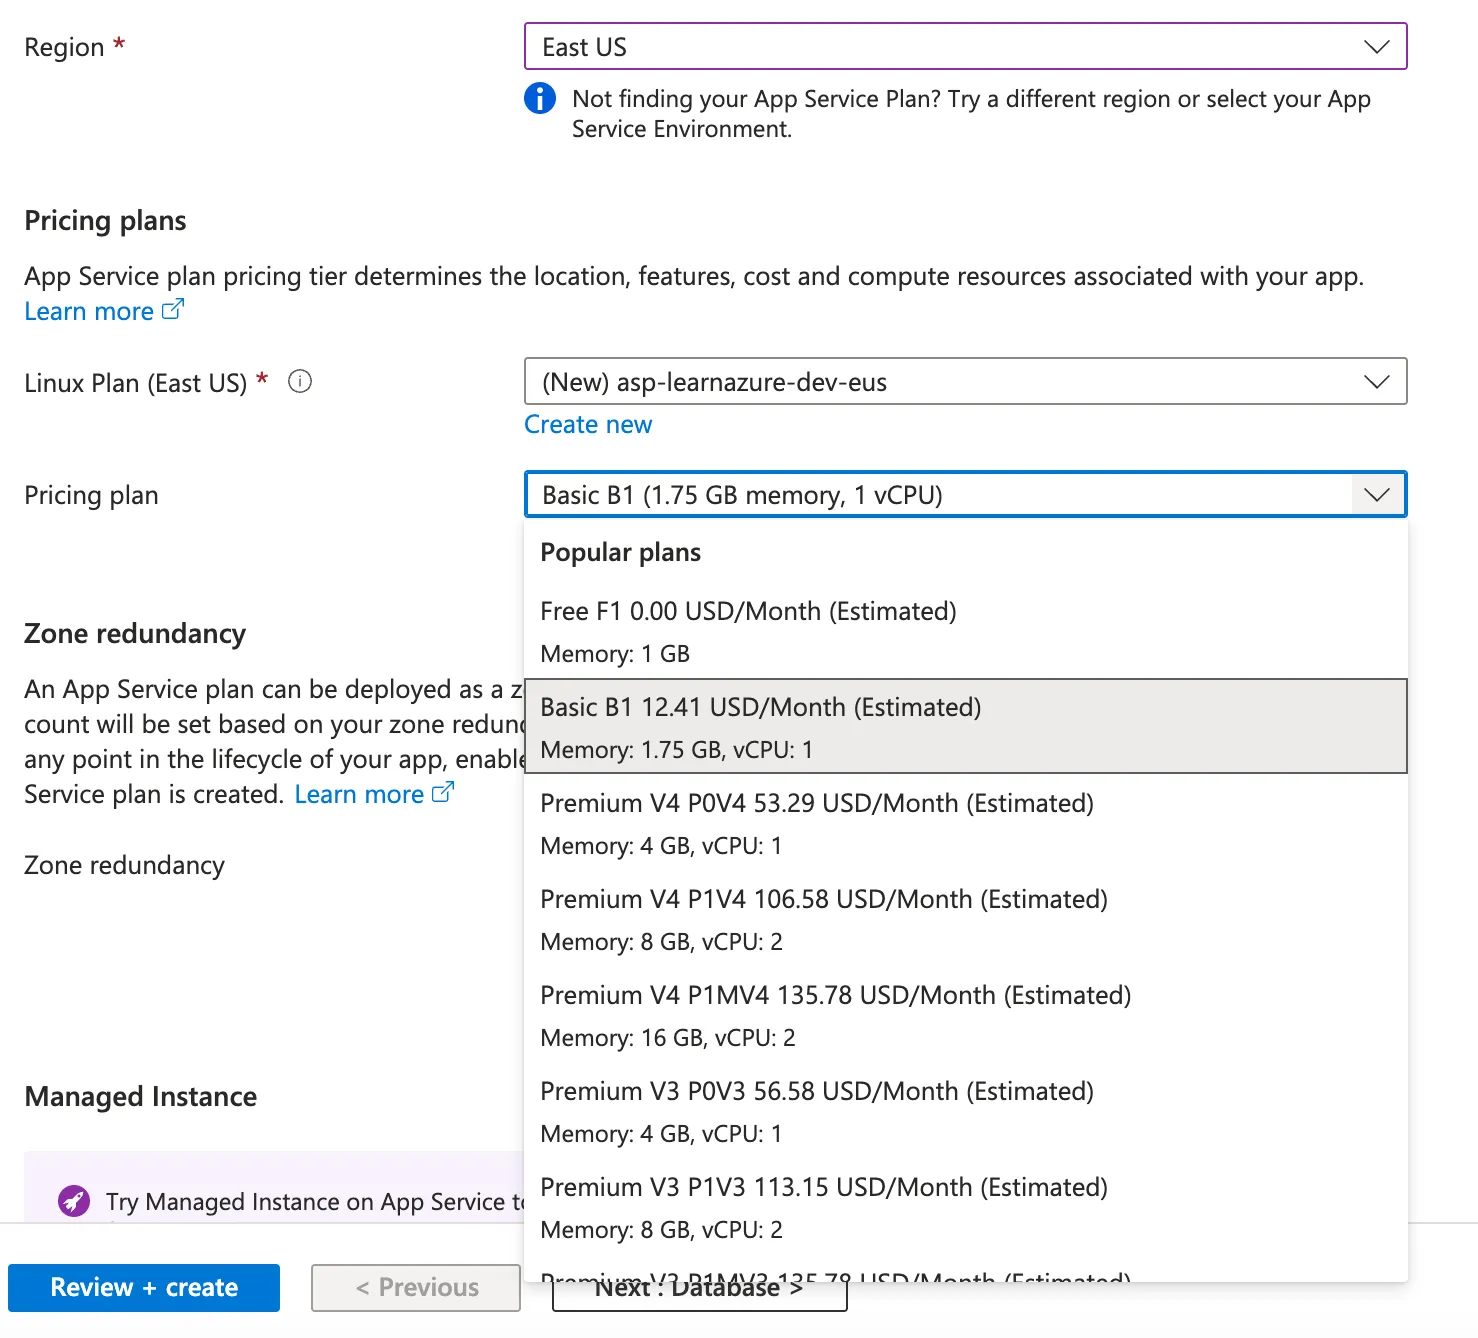
| Plan | Estimated cost | Good for |
|---|---|---|
| Free F1 | $0 | Learning. Shared compute with daily limits. |
| Basic B1 | about $12.41 a month | Small real sites and testing. Billed by the hour. |
| Premium V3 / V4 | $53 to $136+ a month | Production workloads. |
After I upgraded my account (more on that below), the portal pre-selected Premium V3 P0V3 at about $56 a month:
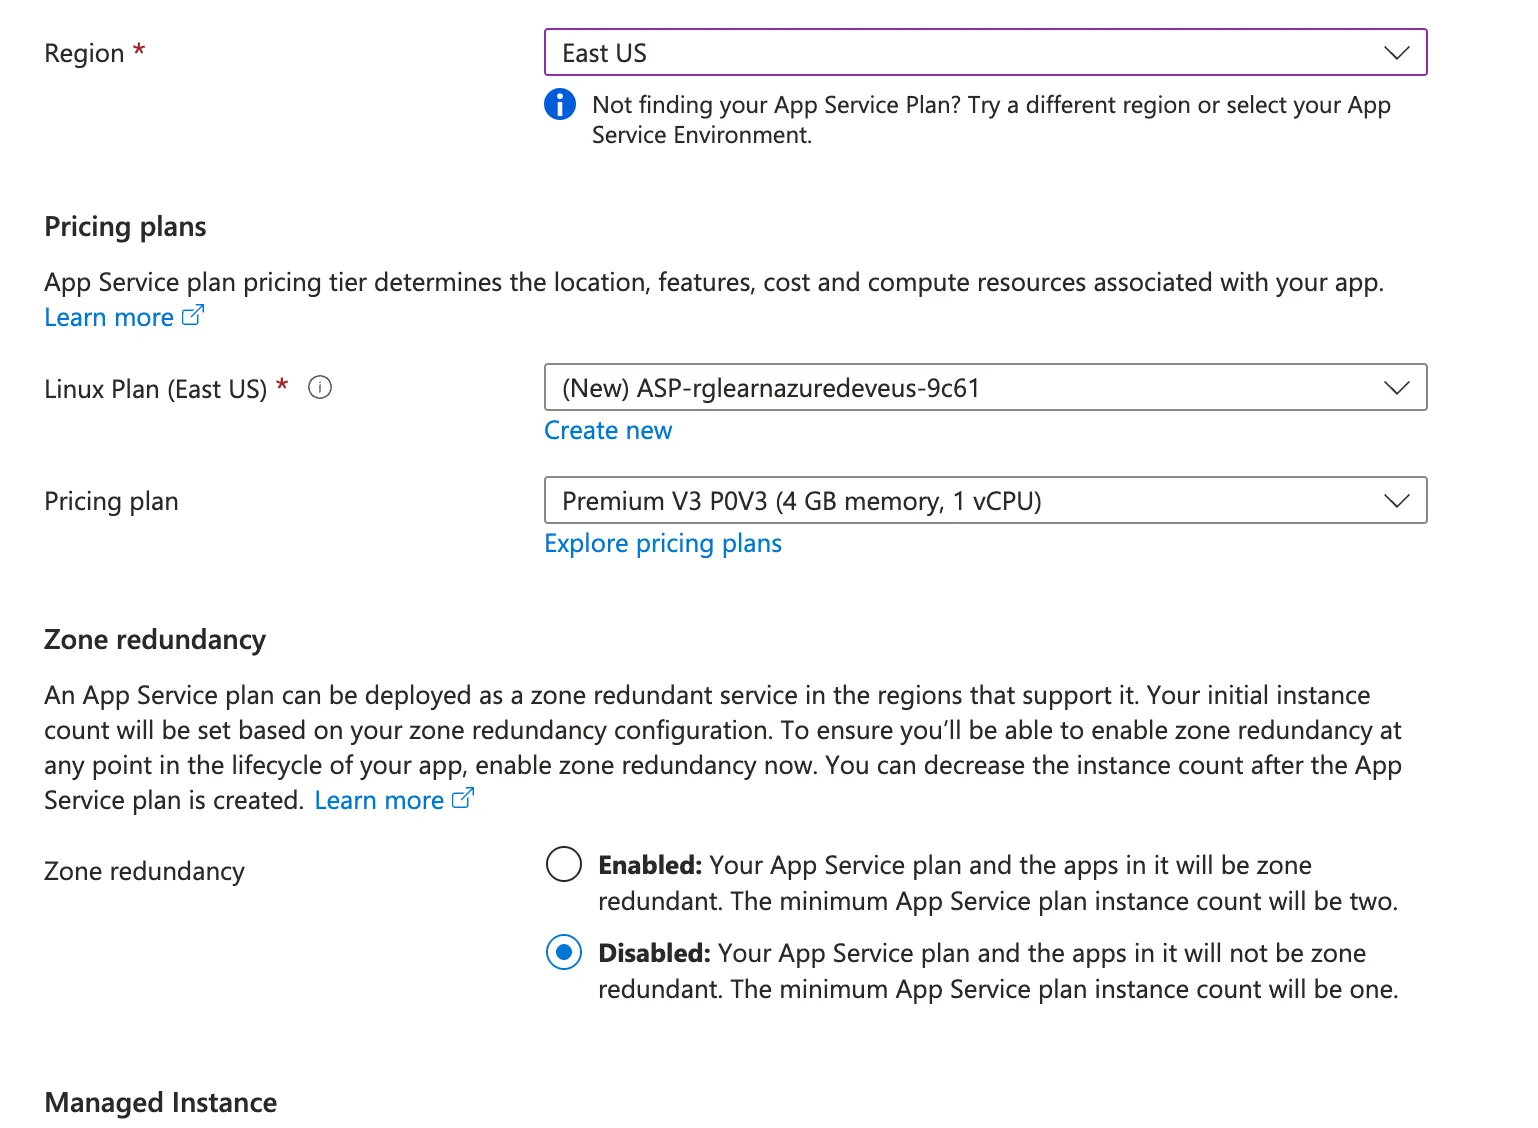
Always check the pricing plan before you select Create. The default is not the cheapest option, and it can change from one visit to the next.
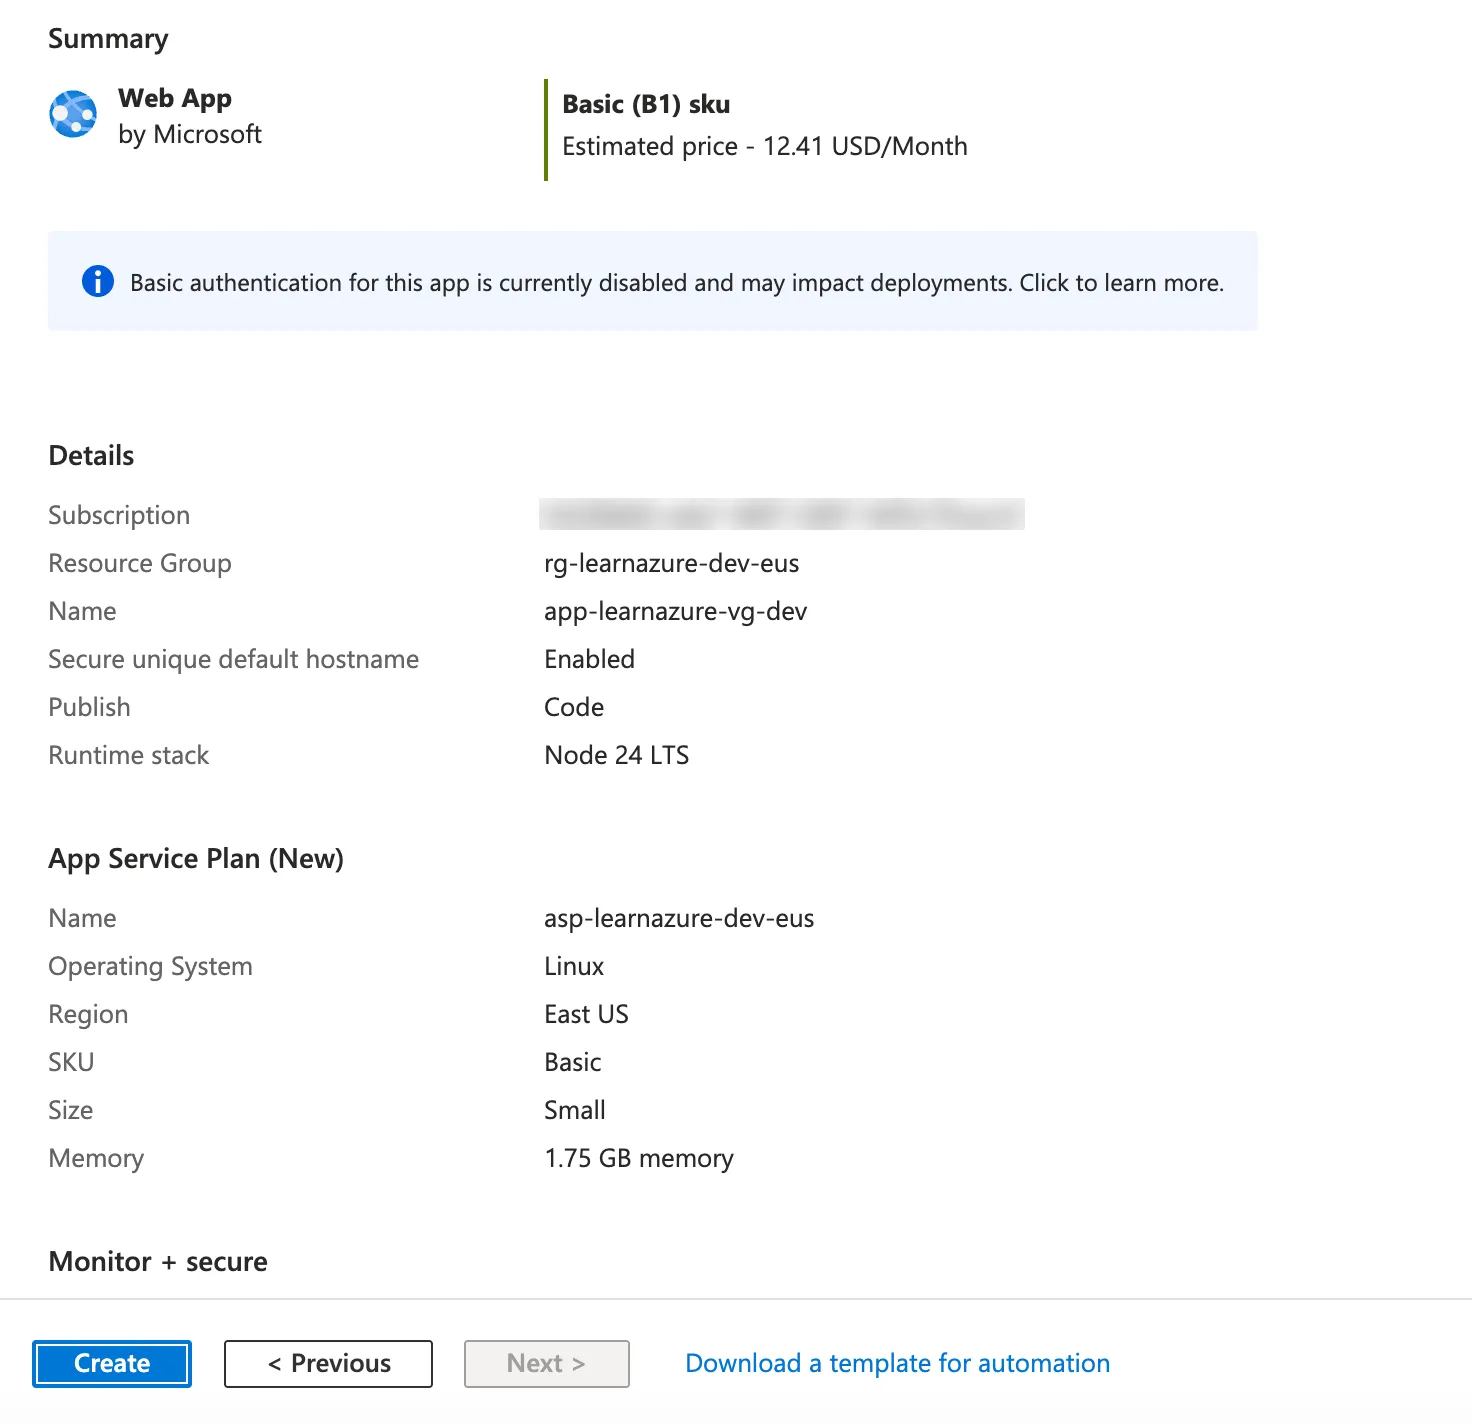
Choose Free F1 if your account allows it, or Basic B1 if it doesn’t. Then select Review + create:
3. When Azure says no: quota limits
On my brand-new free-trial account, selecting Create failed with this:
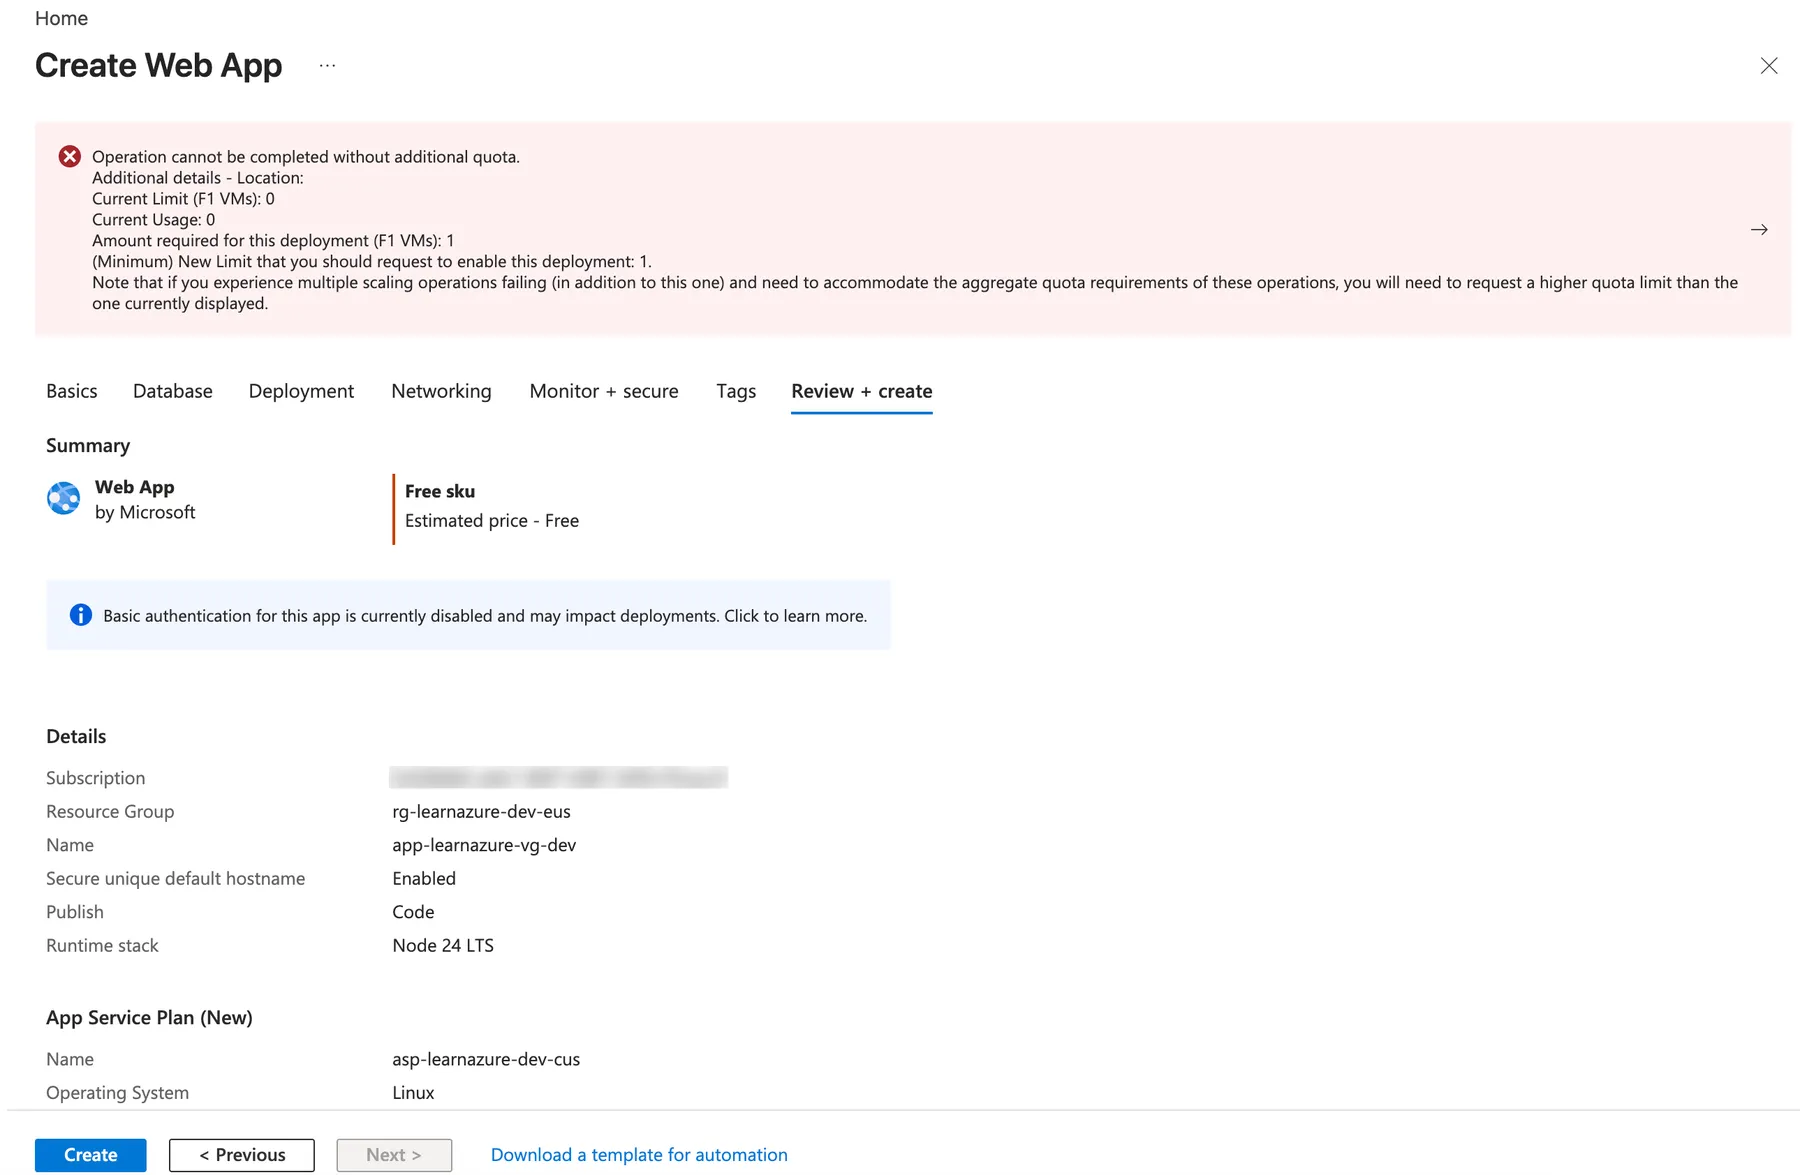
What it means: every subscription has quotas, which are limits on how much of each resource type you can create in each region. New free-trial subscriptions currently start with a limit of 0 for App Service plans, so even the free F1 plan is blocked. Changing region doesn’t help either: I tried East US and Central US and got the same error.
You can see your limits under Quotas → App Service. On the trial account, every row had a warning, and trying to raise one said:
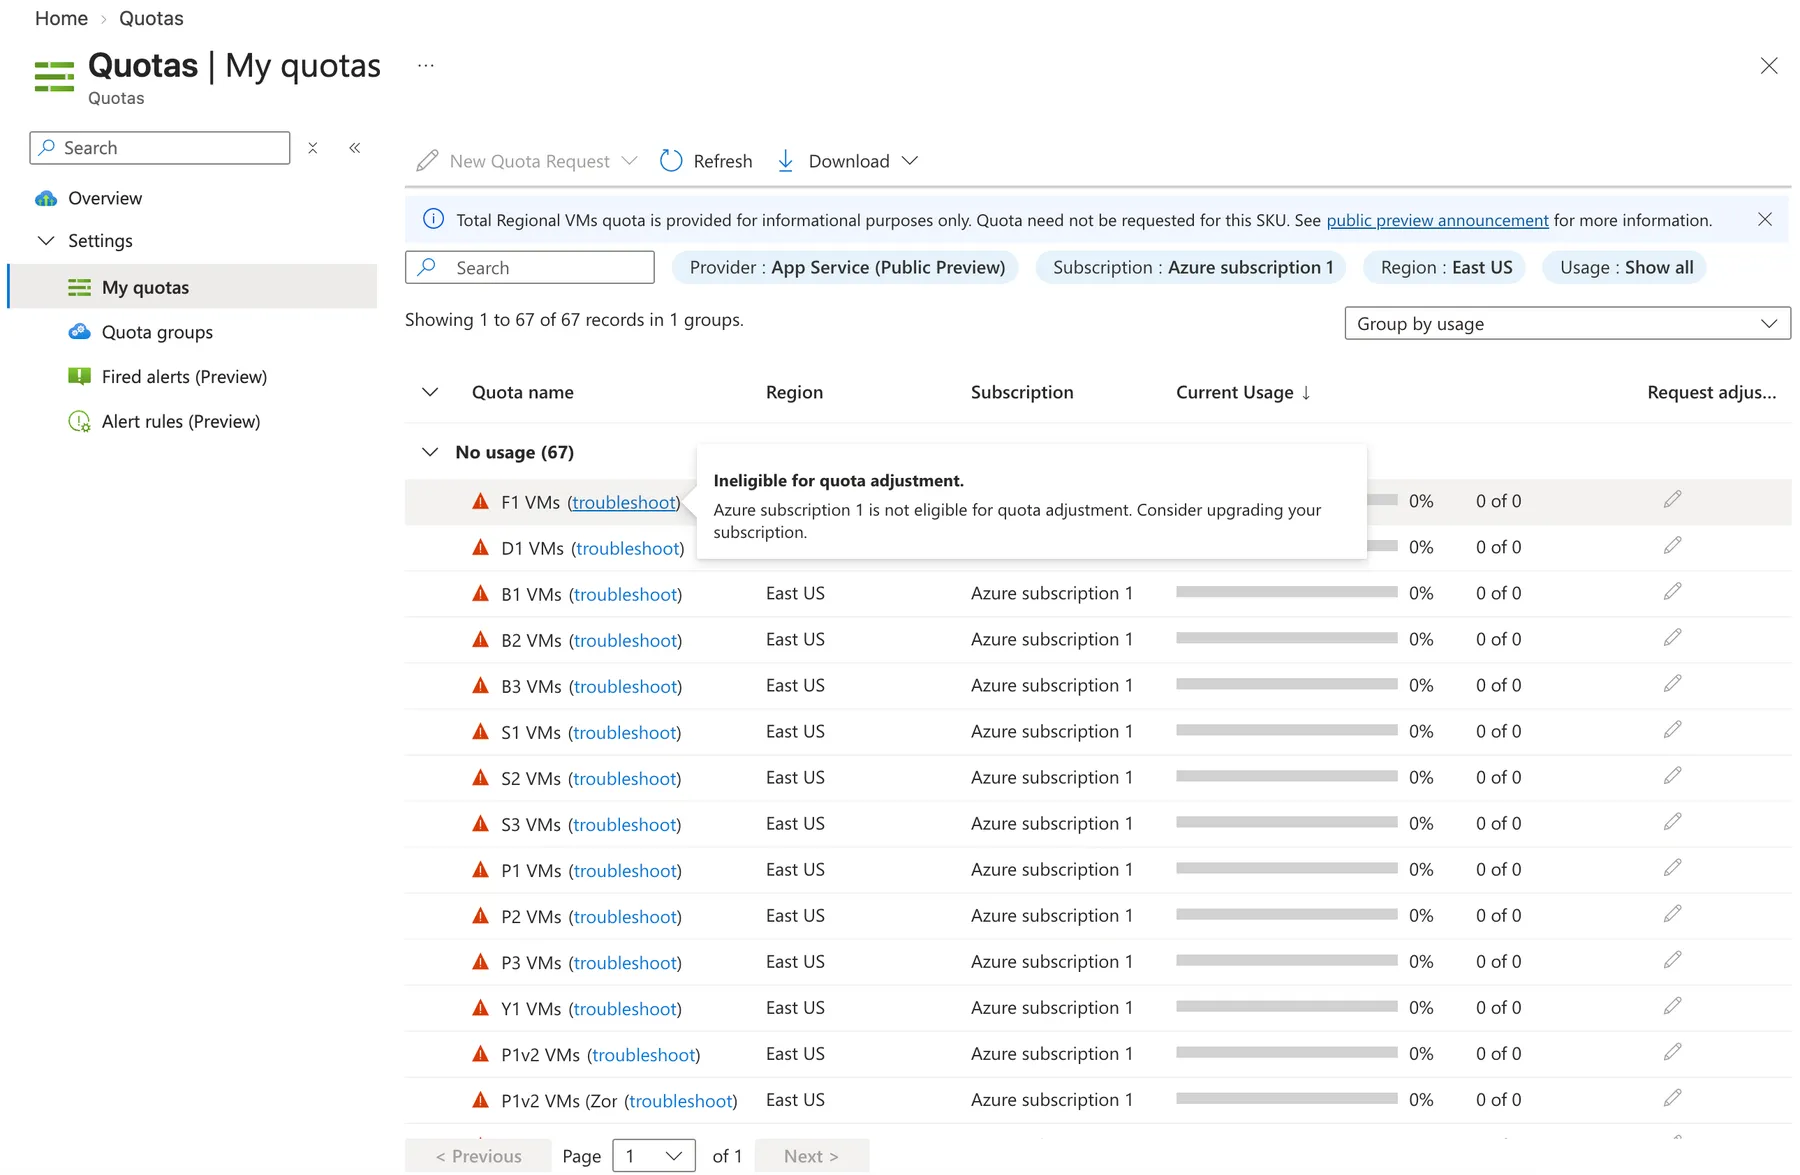
How I fixed it, in three steps:
-
Upgrade to pay-as-you-go. Select Upgrade at the top of the portal. You keep any unused free credit until it expires, and your budget alert from post 1 keeps protecting you. The change can take several minutes to apply; refresh the portal if it still shows the upgrade banner.
-
Request a small quota increase. In Quotas → App Service, filter on your region and select the pencil next to B1 VMs. Ask for a new limit of 1:
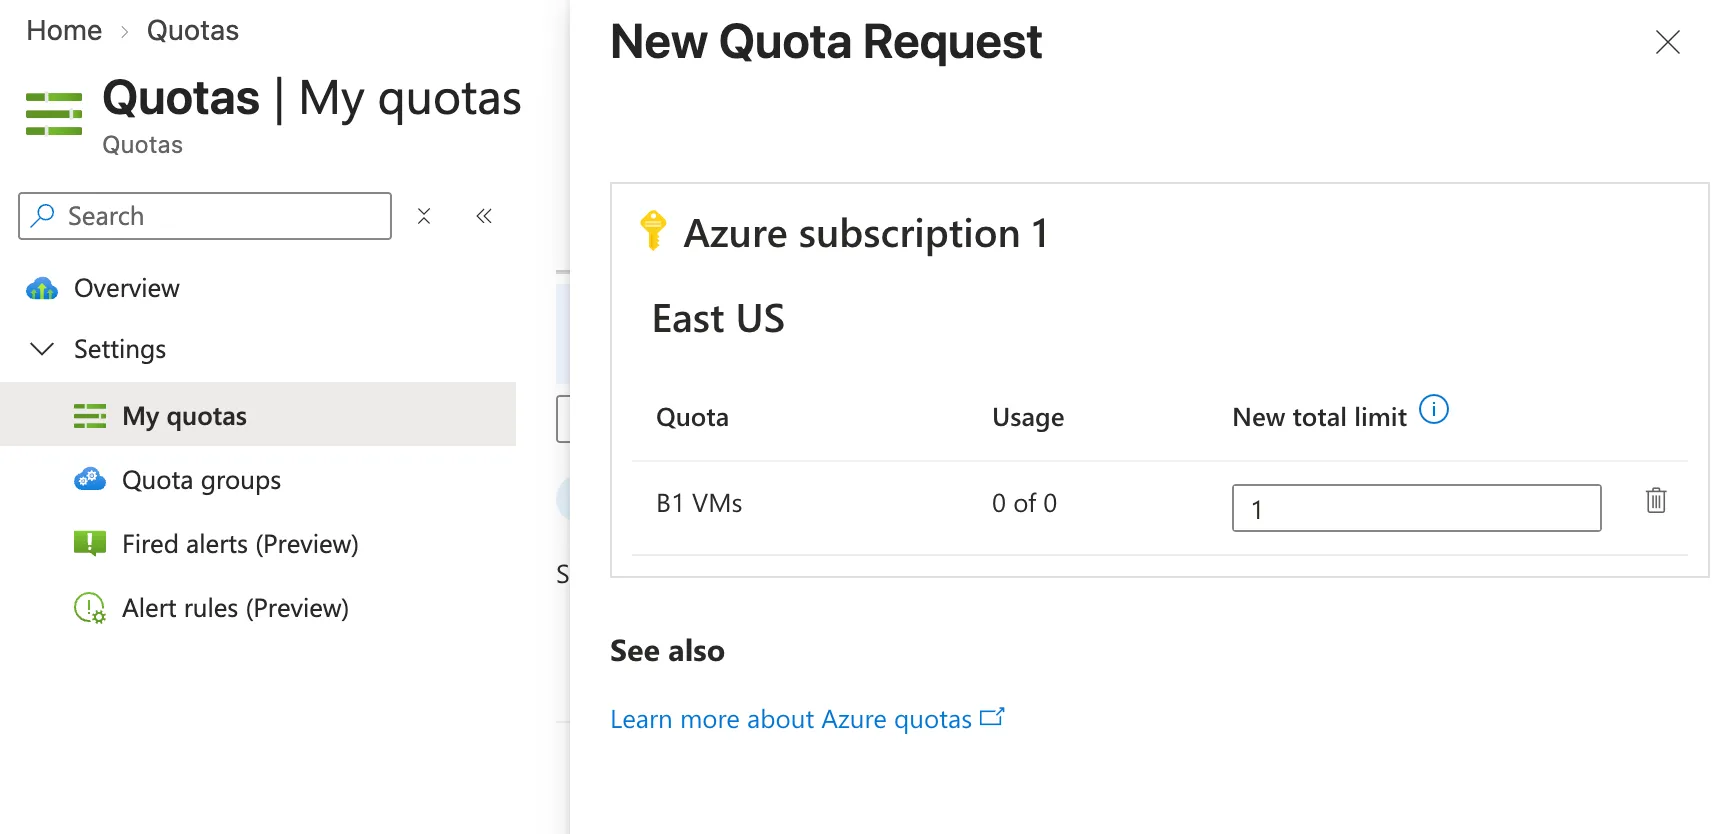
-
If the automatic check declines it, the panel offers Create a support request. Quota requests are free, even on the Basic (free) support plan. Mine was handled within hours and closed automatically.
Once the quota was in place, Create worked first time.
4. Look around your new web app
When deployment finishes, select Go to resource:
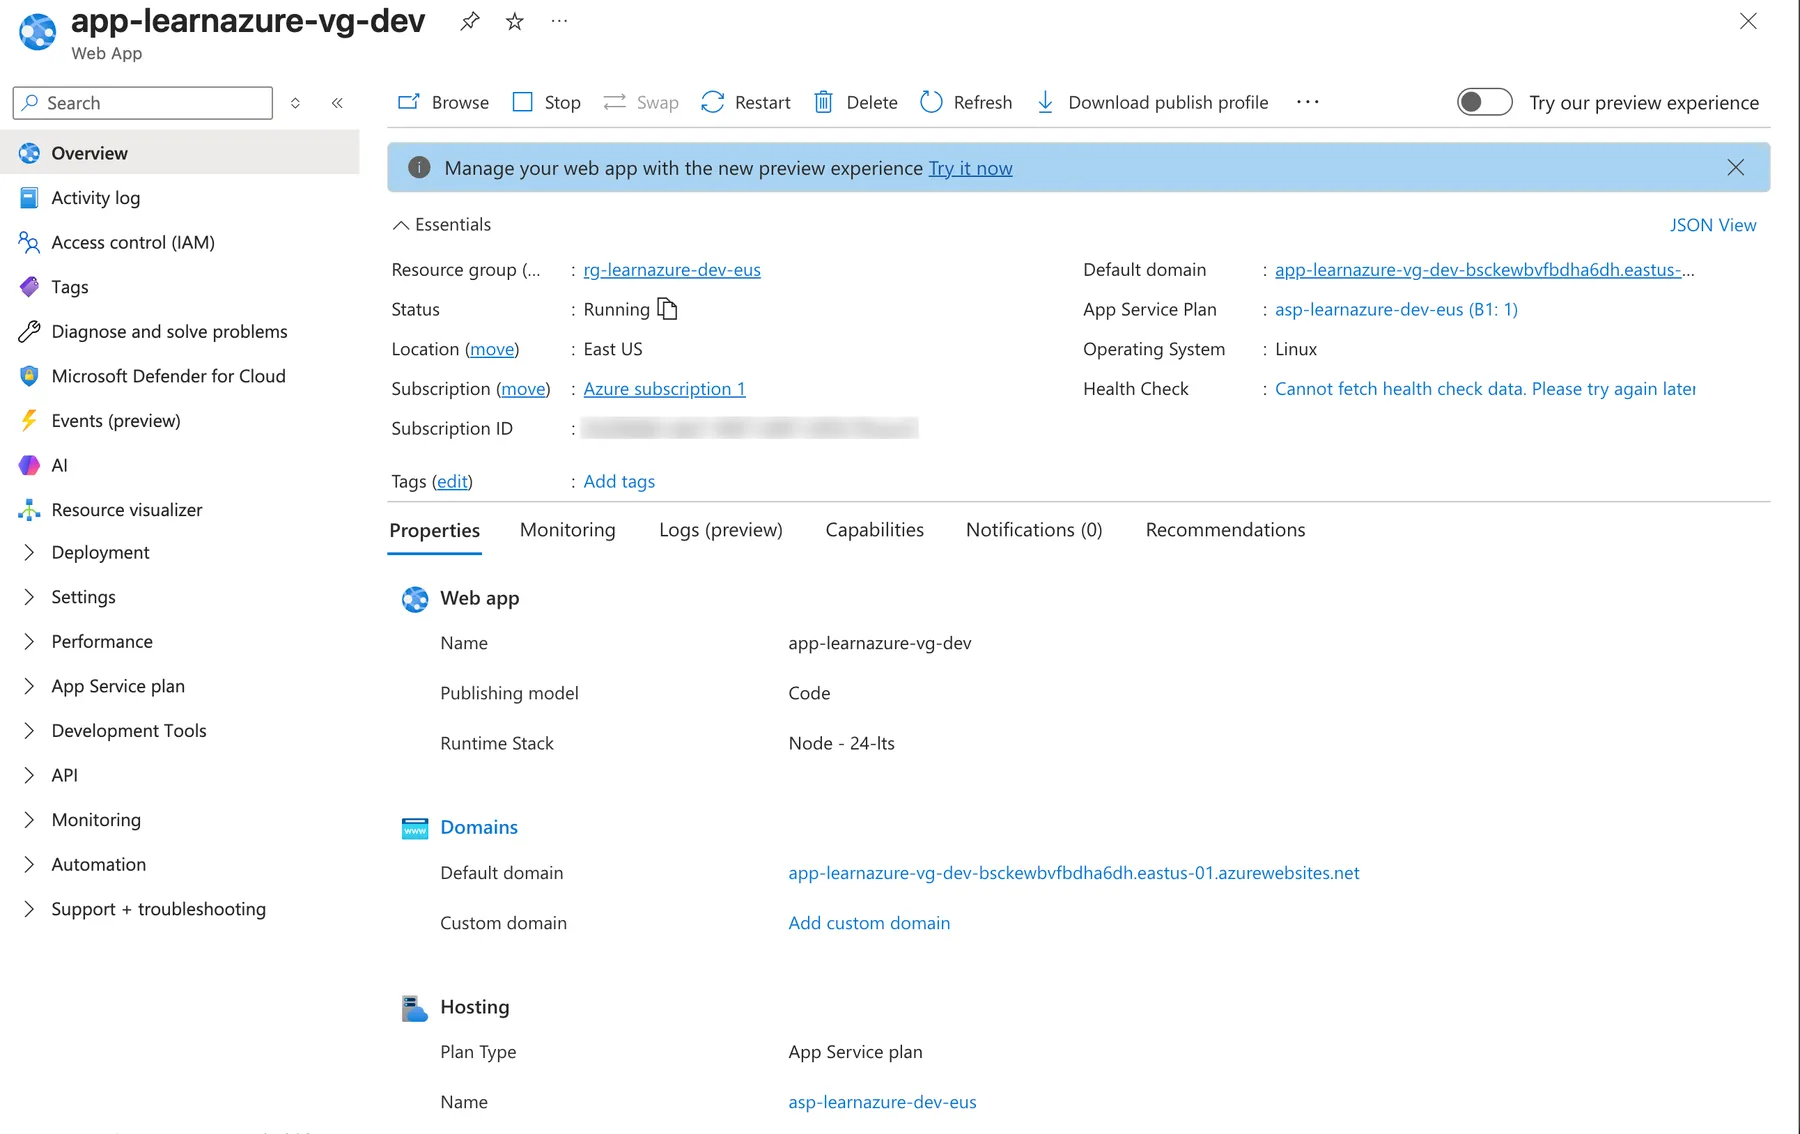
The fields worth knowing:
- Status: Running, Stopped or Restarting.
- Default domain: your public address, ending in
.azurewebsites.net. Newer apps get a random suffix in the name so it can’t be guessed. - App Service Plan: the plan and size you’re paying for.
Open the default domain in a new tab. Before you deploy anything, Azure shows a placeholder:
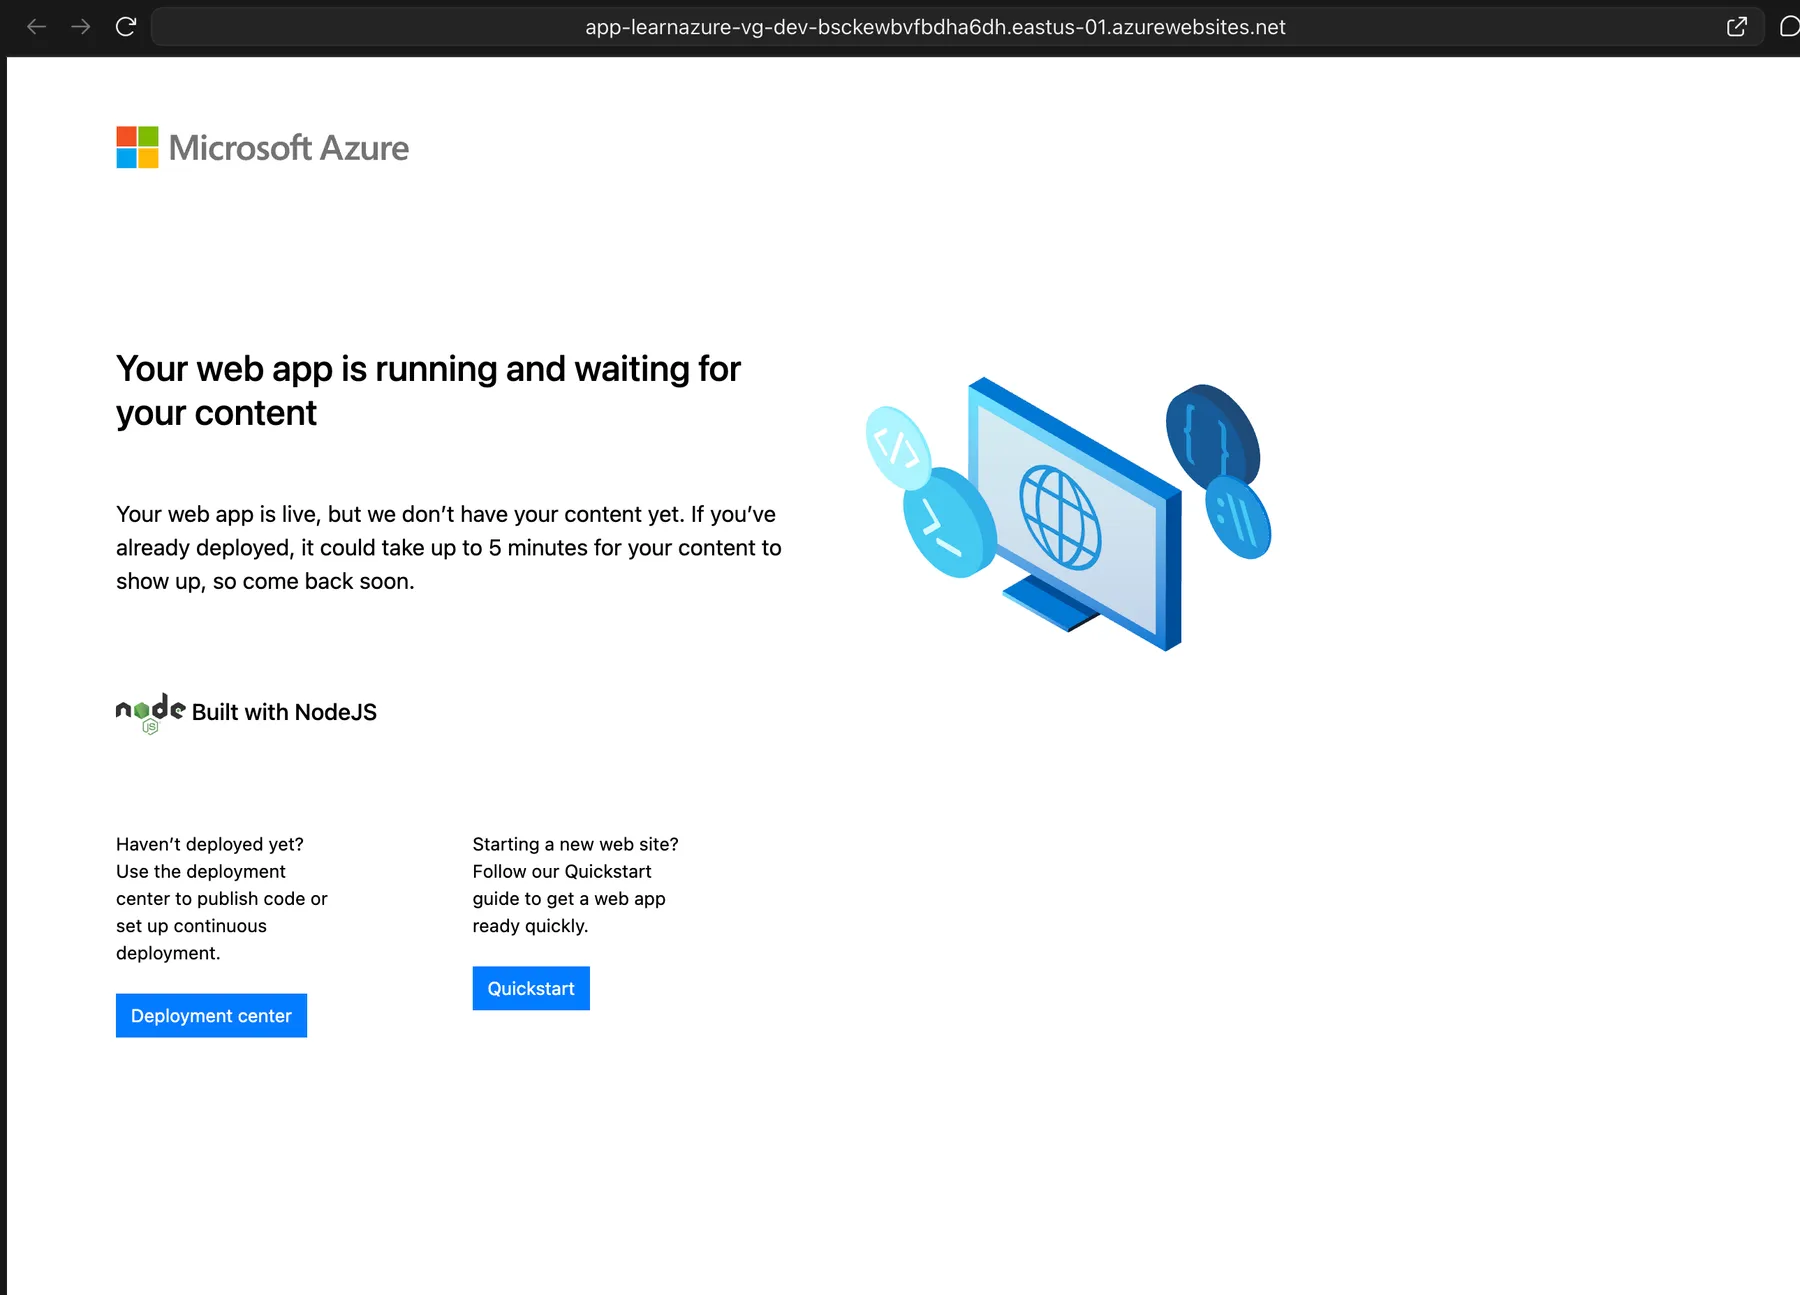
The first visit can take up to a minute while the app starts.
5. Deploy your own code from Cloud Shell
Cloud Shell is a command line that runs in your browser, with the Azure CLI already signed in. Open it with the >_ icon at the top of the portal and choose Bash. When asked about storage, choose No storage account required. Files won’t be kept between sessions, which is fine for this.
Create the app
Make a folder and two files. The easiest way is Cloud Shell’s built-in editor: run code server.js, paste, then save with Ctrl+S (Cmd+S on a Mac).
mkdir hello-azure && cd hello-azure
code server.js
const http = require('http');
// App Service tells your app which port to listen on.
const port = process.env.PORT || 8080;
http.createServer((req, res) => {
res.writeHead(200, { 'Content-Type': 'text/html' });
res.end(`<!doctype html>
<title>Hello from Azure</title>
<h1>Hello from Azure App Service</h1>
<p>Server time: ${new Date().toUTCString()}</p>`);
}).listen(port);Then code package.json:
{
  "name": "hello-azure",
  "version": "1.0.0",
  "scripts": { "start": "node server.js" }
}
App Service runs npm start, so the start script is what launches your app. Listening on process.env.PORT matters: hard-code a port and the site won’t respond.
Zip and deploy
zip app.zip server.js package.json
az webapp deploy \
  --resource-group rg-learnazure-dev-eus \
  --name app-learnazure-<yourinitials>-dev \
  --src-path app.zip --type zip
About 30 seconds later you should see Site started successfully and Deployment has completed successfully:
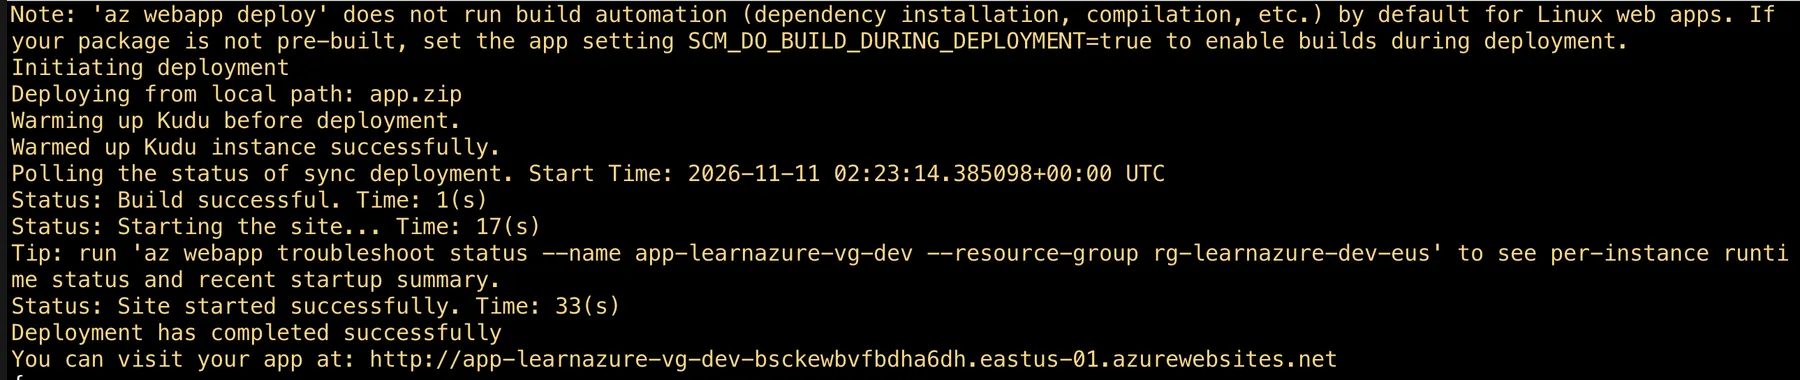
Refresh your web app’s address:
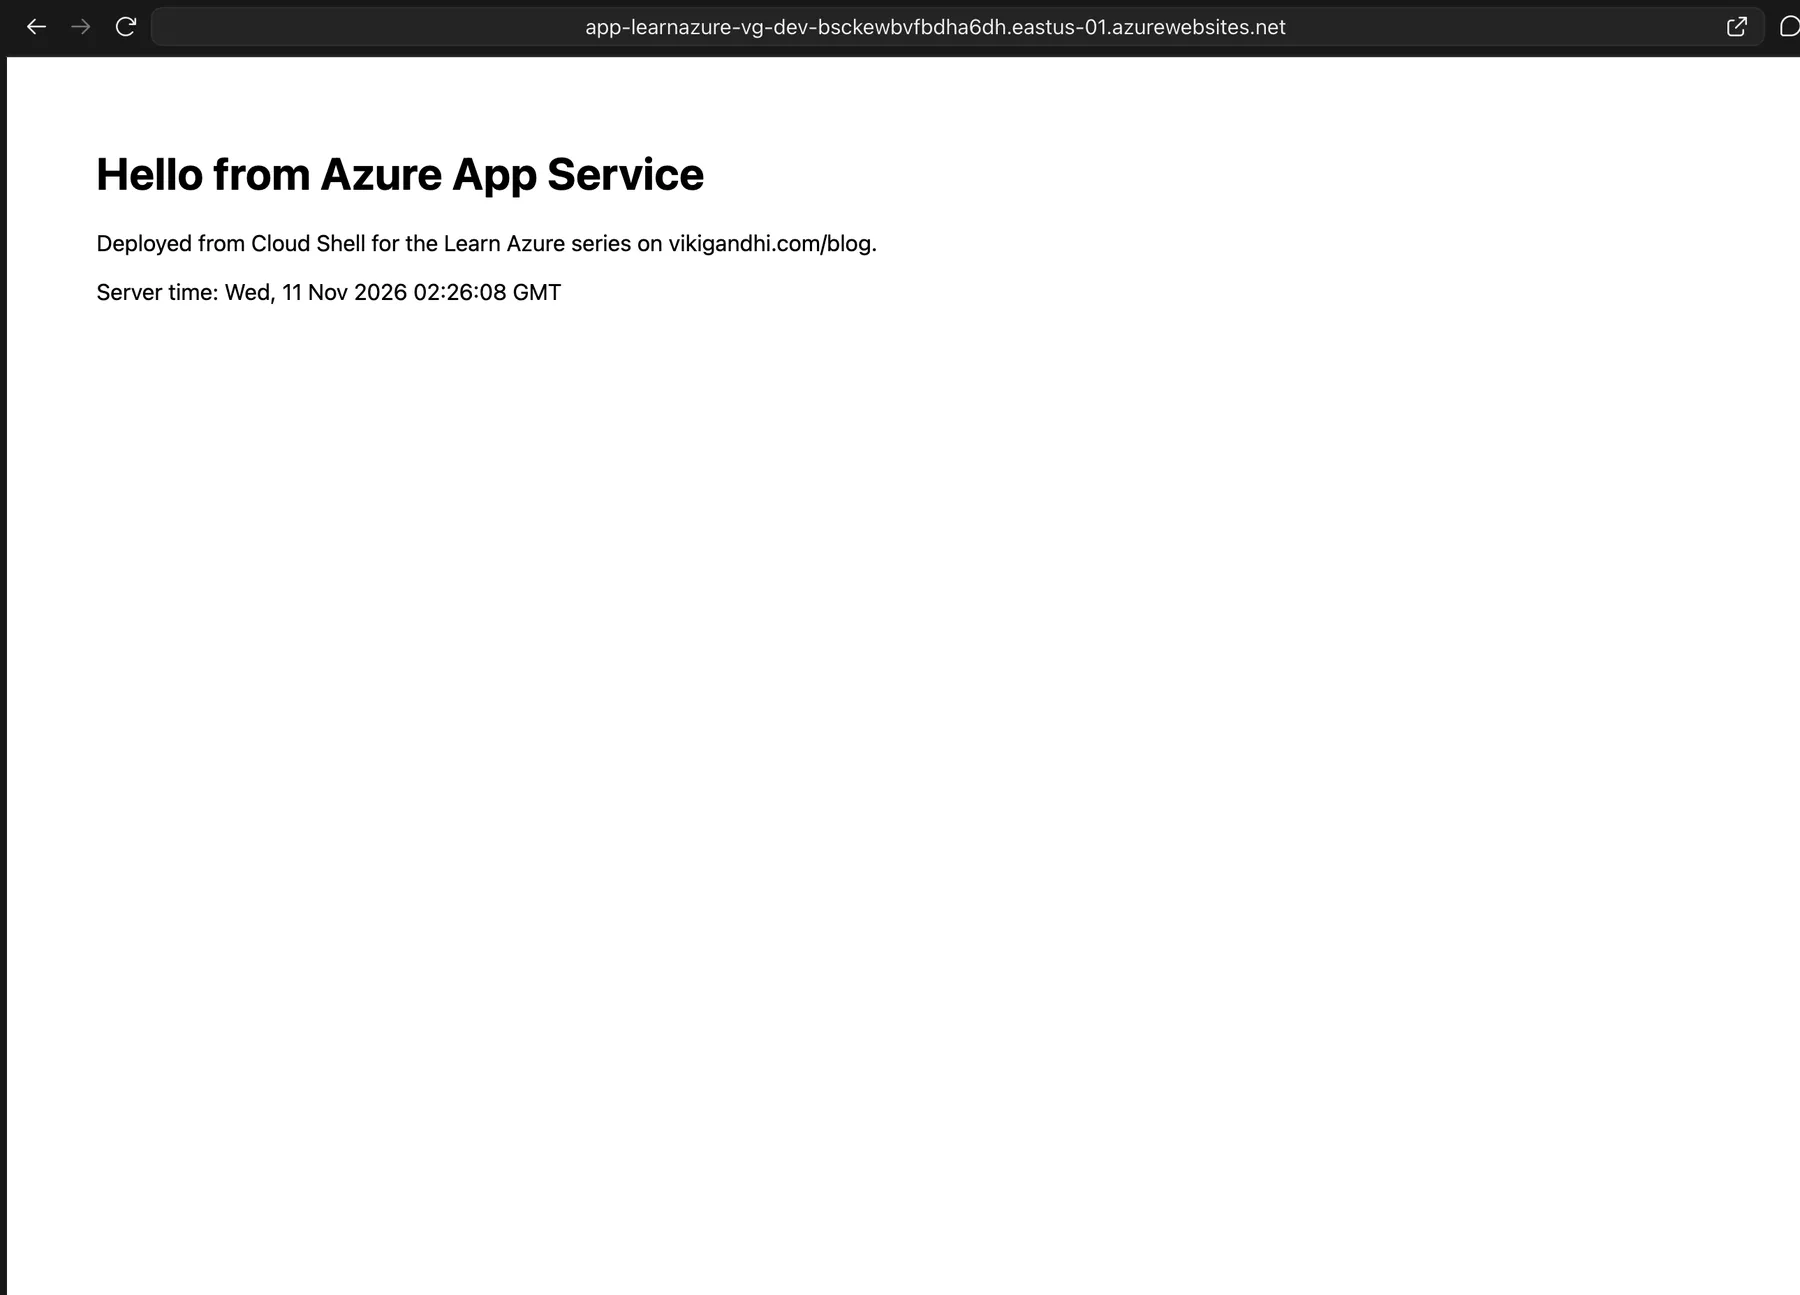
That’s your code, running in Azure, on the internet.
Tip: if the page doesn’t change, wait a minute and refresh. If it shows an error, run
az webapp log tail -g rg-learnazure-dev-eus -n <your-app>in Cloud Shell to see what your app printed when it started.
6. Clean up so you only pay cents
A B1 plan bills by the hour whether anyone visits or not. Delete the app and its plan as soon as you’re done:
az webapp delete -g rg-learnazure-dev-eus -n app-learnazure-<yourinitials>-dev
az resource list -g rg-learnazure-dev-eus -o table
When you delete the last app on a plan, Azure deletes the plan too. The second command should list nothing. Keep the empty resource group for the next post; it costs nothing.
My whole session, with about an hour on B1, came to a few cents, paid from the free credit.
Failed create attempts can also leave empty groups called DefaultResourceGroup-EUS or similar. They’re free, but delete them to keep things tidy:
az group delete -n DefaultResourceGroup-EUS --yesQuick check
1. You delete your only web app but keep the App Service plan. Are you still paying?
Yes. You pay for the plan, not the app. Delete the plan too, or delete the last app with the CLI, which removes an empty plan automatically.
2. Create fails with “Current Limit (F1 VMs): 0”. Will choosing another region fix it?
Usually not on a new trial subscription: the limit is 0 everywhere. Upgrade to pay-as-you-go, then request a quota increase for the plan size you need.
3. Your app works on your laptop on port 3000 but shows an error on Azure. What’s the first thing to check?
That it listens on process.env.PORT. App Service chooses the port and passes it in that variable.
4. Which pricing plan does the Create Web App form choose by default?
It varies, and it is often not the cheapest. On my upgraded account it pre-selected Premium V3 at about $56 a month. Always check before you create.
What’s next
Level 1, post 3: Storage accounts, blobs and access keys. We’ll store files in Azure, look at the cheapest storage options, and see why you should almost never hand out an access key.
Further reading
- App Service overview (Microsoft Learn)
- App Service pricing (Microsoft)
- Deploy files to App Service with
az webapp deploy(Microsoft Learn) - Azure subscription and service limits, quotas and constraints (Microsoft Learn)
- Get started with Azure Cloud Shell (Microsoft Learn)