Every Azure journey starts the same way: an account, a subscription and an empty portal that offers you 200 services at once. This post gets you through that first hour calmly. By the end you will have:
- a free Azure account,
- a clear picture of how Azure organises everything you create,
- your first resource group, named and tagged properly,
- a budget alert that emails you before your bill can surprise you.
Nothing in this post costs money. Resource groups and budgets are free.
1. How Azure is organised
Before clicking anything, it helps to know the four boxes everything lives in. Most confusion in the first week comes from mixing these up.
| Level | What it is | Think of it as |
|---|---|---|
| Tenant (Microsoft Entra ID) | Your organisation’s identity directory: users, groups, sign-ins. Created automatically when you sign up. | The building |
| Subscription | A billing and access boundary. Everything inside it is billed together. | A floor with its own electricity meter |
| Resource group | A folder for resources that live and die together, such as one app and its database. | A room |
| Resource | The actual thing you pay for: a web app, a database, a storage account. | The furniture |
Two rules worth remembering now:
- Every resource belongs to exactly one resource group, and every resource group belongs to exactly one subscription.
- Deleting a resource group deletes everything in it. That is a feature: it is the easiest way to clean up after an experiment.
2. Create your free account
Go to the Azure account page and choose Try Azure for free.
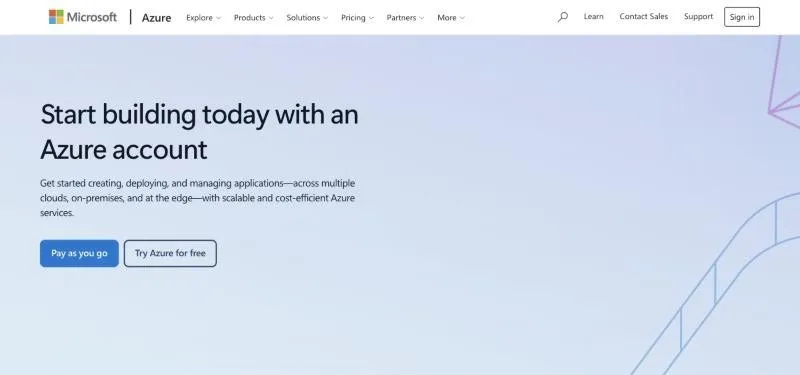
You will be asked to choose between two account types:
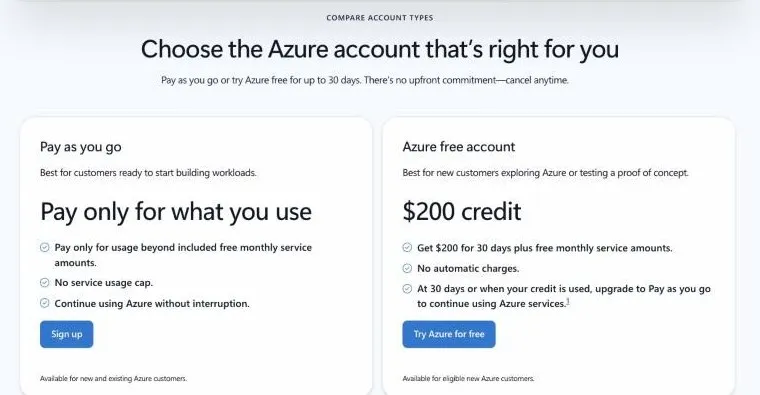
- Azure free account: $200 of credit for 30 days, plus free monthly amounts of popular services. Best for learning.
- Pay as you go: no credit, you pay only for what you use beyond the free amounts.
The sign-up itself takes about five minutes. Have these ready:
- A Microsoft account (Outlook, Hotmail or any email you register as one) or a GitHub account
- A mobile phone for a verification code
- A credit or debit card (not prepaid). Azure places a temporary $1 hold to verify it, then releases it.
You are not charged automatically. When the 30 days end or the credit runs out, Azure asks you to upgrade to pay-as-you-go. Until you do, nothing is billed. The free credit is available only once per person.
When sign-up finishes you land on the Azure portal at portal.azure.com. This is where the rest of this post happens.
3. Find your subscription
Type Subscriptions in the search bar at the top of the portal and open it.
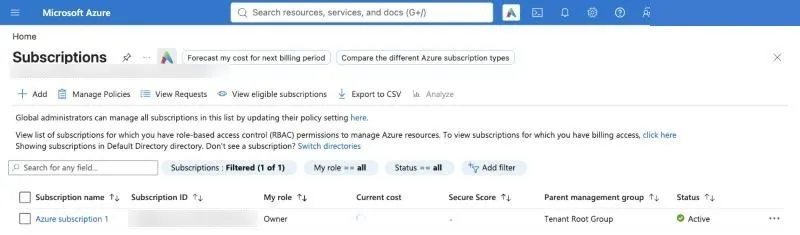
You should see one subscription, usually called Azure subscription 1, with:
- My role: Owner. You can do anything in it, including granting access to others.
- Status: Active.
The Subscription ID is a long GUID. You will need it later for the command line and for automation, but treat it like an account number: no need to post it publicly.
4. Create your first resource group
Search for Resource groups. The list is empty, which is exactly what you want on day one.
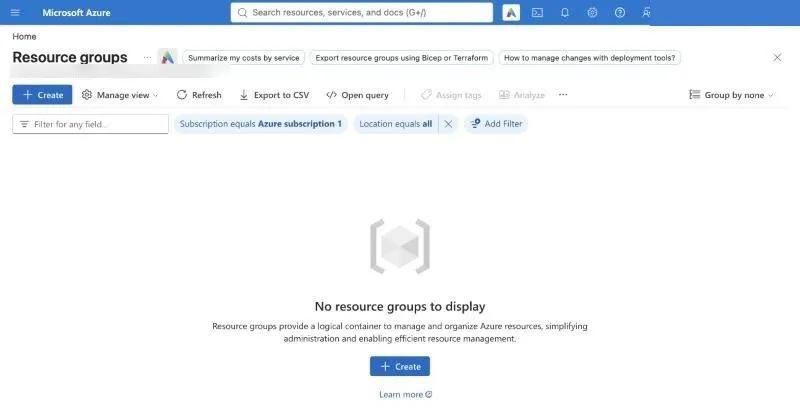
Select Create and fill in the Basics tab:
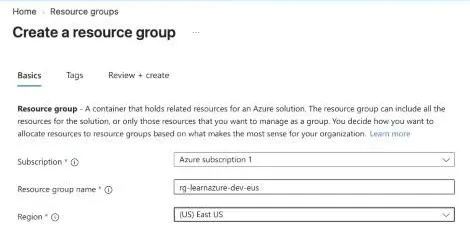
- Subscription: Azure subscription 1
- Resource group name:
rg-learnazure-dev-eus - Region: (US) East US, or the region closest to you
Why that name?
A naming pattern costs nothing today and saves hours later, when you have 40 resource groups and need to know at a glance what each one is. A common pattern, based on Microsoft’s Cloud Adoption Framework, is:
rg-<workload>-<environment>-<region>
rg-learnazure-dev-eus| Part | Example | Meaning |
|---|---|---|
rg | rg | Resource type: resource group |
| workload | learnazure | What it is for |
| environment | dev | dev, test or prod |
| region | eus | Short code for East US |
What does the region mean for a resource group?
The region is where Azure stores the resource group’s metadata, the list of what is inside it. The resources themselves can live in other regions. Pick the region you will use most, and keep it consistent.
Add tags
Open the Tags tab and add two tags:
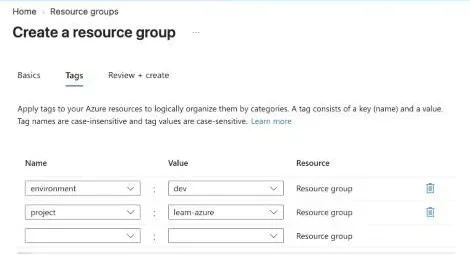
| Name | Value |
|---|---|
environment | dev |
project | learn-azure |
Tags are labels you can filter and group by in the portal and on your bill. Later, “how much did project = learn-azure cost this month?” becomes a two-click question.
Review and create
Select Review + create. Azure validates the settings and shows a summary.
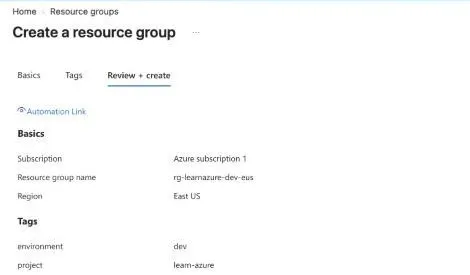
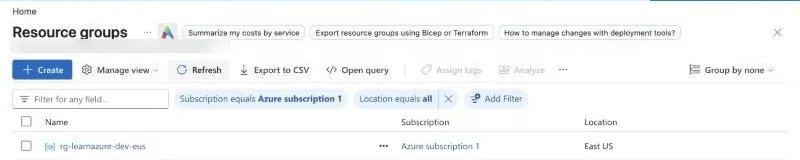
Select Create. A few seconds later your resource group appears in the list.
5. Set a budget alert before anything else
This is the step most beginners skip, and the one I recommend most. A budget is a monthly amount you expect to spend. Azure emails you as you approach it.
Search for Budgets (it lives under Cost Management) and select Add.
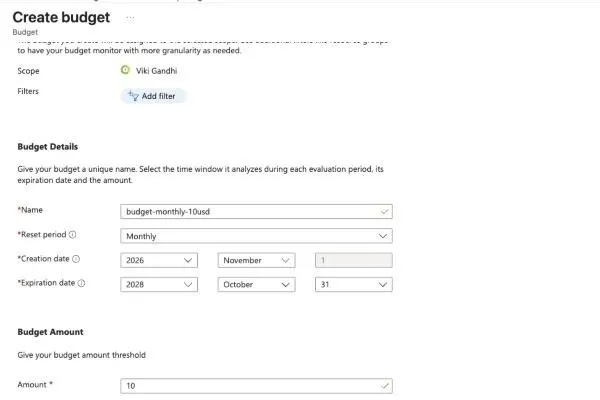
- Name:
budget-monthly-10usd - Reset period: Monthly
- Expiration date: leave the default (about two years out)
- Amount:
10
Select Next and add three alert conditions:
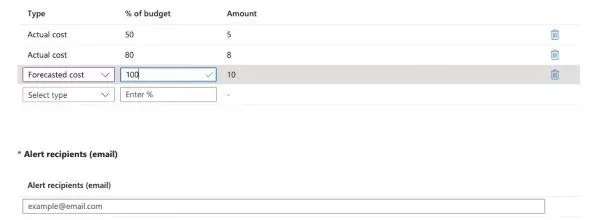
| Type | % of budget | Fires when |
|---|---|---|
| Actual cost | 50% | You have actually spent $5 this month |
| Actual cost | 80% | You have actually spent $8 |
| Forecasted cost | 100% | Azure predicts you will reach $10 by month end |
The forecasted alert is the useful one: it warns you while there is still time to act.
Add your email under Alert recipients, then select Create. The budget appears in the list straight away:
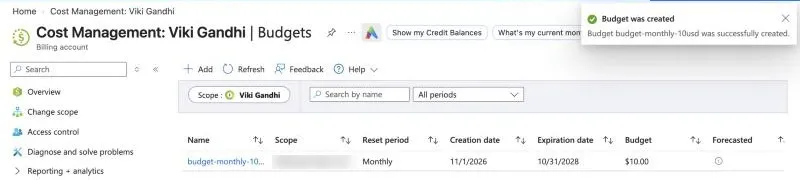
A budget does not stop spending. It only sends alerts. Azure keeps running whatever you deploy. Treat the email as a signal to check the Cost analysis page and delete anything you forgot about. Cost data can also take up to a day to appear, so check alerts a little ahead of time rather than at the last minute.
6. Clean up
There is nothing to clean up yet: an empty resource group and a budget cost nothing. Keep both, because the next post deploys a web app into rg-learnazure-dev-eus.
When you finish an experiment in future posts, the cleanest exit is always the same: delete the resource group, and everything inside it goes with it.
Quick check
1. You delete a resource group that contains a web app and a database. What happens?
Both are deleted with it. A resource group’s lifetime controls the lifetime of everything inside it.
2. Your resource group is in East US. Can it contain a database in West Europe?
Yes. The resource group’s region only says where its metadata lives. Resources inside can be in any region.
3. Your monthly budget is $10 and you deploy something expensive. Does Azure stop it at $10?
No. Budgets send alerts; they do not stop or delete anything. You have to act on the alert.
4. Which alert warns you earliest: actual cost at 80% or forecasted cost at 100%?
Usually the forecasted one. It fires as soon as Azure predicts you will cross the budget, often days before you actually do.
What’s next
Level 1, post 2: Deploying a web app with App Service. We will put a real web page on the internet inside the resource group you just created, look at pricing tiers, and deal with the quota limits new accounts hit.
Further reading
- Azure account options and the free account (Microsoft)
- What is Azure Resource Manager? (Microsoft Learn)
- Define your naming convention (Cloud Adoption Framework)
- Tutorial: Create and manage budgets (Microsoft Learn)